Unit 1 – My Camera and approaches to Photography (AC1.1, AC2.1, AC2.2, AC4.1 )
It is important to note that my camera is a Canon EOS 80D which has a APS-C sensor. The ‘crop factor’ of my camera is 1.6x. All lenses are described by their focal length (24mm, 50mm, 100mm etc) in relation to a full frame sensor. Hence using a 50mm on my camera will have the effect of a 80mm on a full frame sensor. This effect is described visually below.
I enjoy most forms of photography, but generally prefer to keep a distance from my subject matter and so often move more towards landscape and wildlife photography. I also like to try to work with movement and emphasise light and its effects.
I shoot mostly with the camera set to aperture priority (Av). I find this the best way to achieve my desired outcomes as depth of field is normally my first priority. Similarly I start with the camera set at ISO100, thus getting highest quality. Clearly on occasion both of these have to be compromised to achieve faster shutter speeds, but I will still mostly do this by widening the aperture on Av, and then increasing ISO if need be.
Photographic influences
I recently went to the Martin Parr ‘Only Human’ exhibition which I thoroughly enjoyed. His work is wonderfully full of mischief, humour and colour. I also liked his often slight blurring to emphasise movement. Most of his work is up close, but I also enjoyed some of his more distant shots:-
. Source: radiotimes.com
Source : blackwells.co.uk
I found Trish Murtha and her poignant documentary photos very powerful indeed. She had a very important social message to convey. I think her use of black and white in her photography helped emphasise her message.
Source: twitter.com
Source: amazon.co.uk
In direct contrast, fashion and style photographer Mark Sanders clearly achieves some very slick, silky smooth shots which work well in their genre. I like this shot below with the blurring of clouds accentuating the shot of the Shard.
Source: standard.co.uk
I like Rut Blees Luxemburg’s urban photography very much. She specialises in longer exposure mainly nighttime photography, which I would like to explore further. Here she skilfully manages to emphasise the pedestrian’s movement with a little blurring whilst getting the lorry’s headlight and streetlights still and max light-rays.
 Source: museum crunch.org
Finally, I also toyed with ICM (Intentional Camera Movement). This involves handheld shots with slowish shutter speeds, and deliberately moving the camera to create various effects as seen below.
Source: pxleyes.com
 Source: digital-photography-school.com
 Source: reddit.com
Health and Safety (AC4.1)
Most camera equipment seems to be heavy, sharp edged, often bulky and sensitive, and so needs to be looked after well, both for its own safety and that of others. This is particularly the case when you add a tripod to the mix. In addition to this most camera equipment is quite delicate and must be looked after well. I have often been out photographing on roads, pathways, bridges, in glasshouses, as well as by rivers and lakes etc., all of which potentially create hazards. There have often been people about or even in shot, as well as wildlife. It is important to be considerate of all these factors. One should always endeavour to seek permission from people in shot, be wary and keep a safe distance from wildlife. When shooting it is important to be very aware of your surroundings, not blocking pathways or getting in the way of others. When using a tripod this only adds to the required considerations of others and surroundings, as you potentially become a larger even less mobile obstruction. One is allowed to photograph in most public spaces, but will invariably need permission in private spaces. This includes stations, galleries and obviously office buildings. You should also be careful not to infringe on any copyrights and accredit others’ work. I keep my camera, lenses and filters securely in a dedicated, padded backpack.
Unit 1 – Task 1 – Depth of field, AC (2.1,2.2)
Depth of field describes the distance between the closest and furthest objects that are in focus. Different depths of field can be achieved by adjusting the aperture on your camera, whereby the lower the f-stop number (f2.8, f4), the wider the aperture, and the narrower the depth of field. Conversely a higher f-stop (f16, f22) and so narrower aperture will generate a longer depth of field. This is well described visually below :-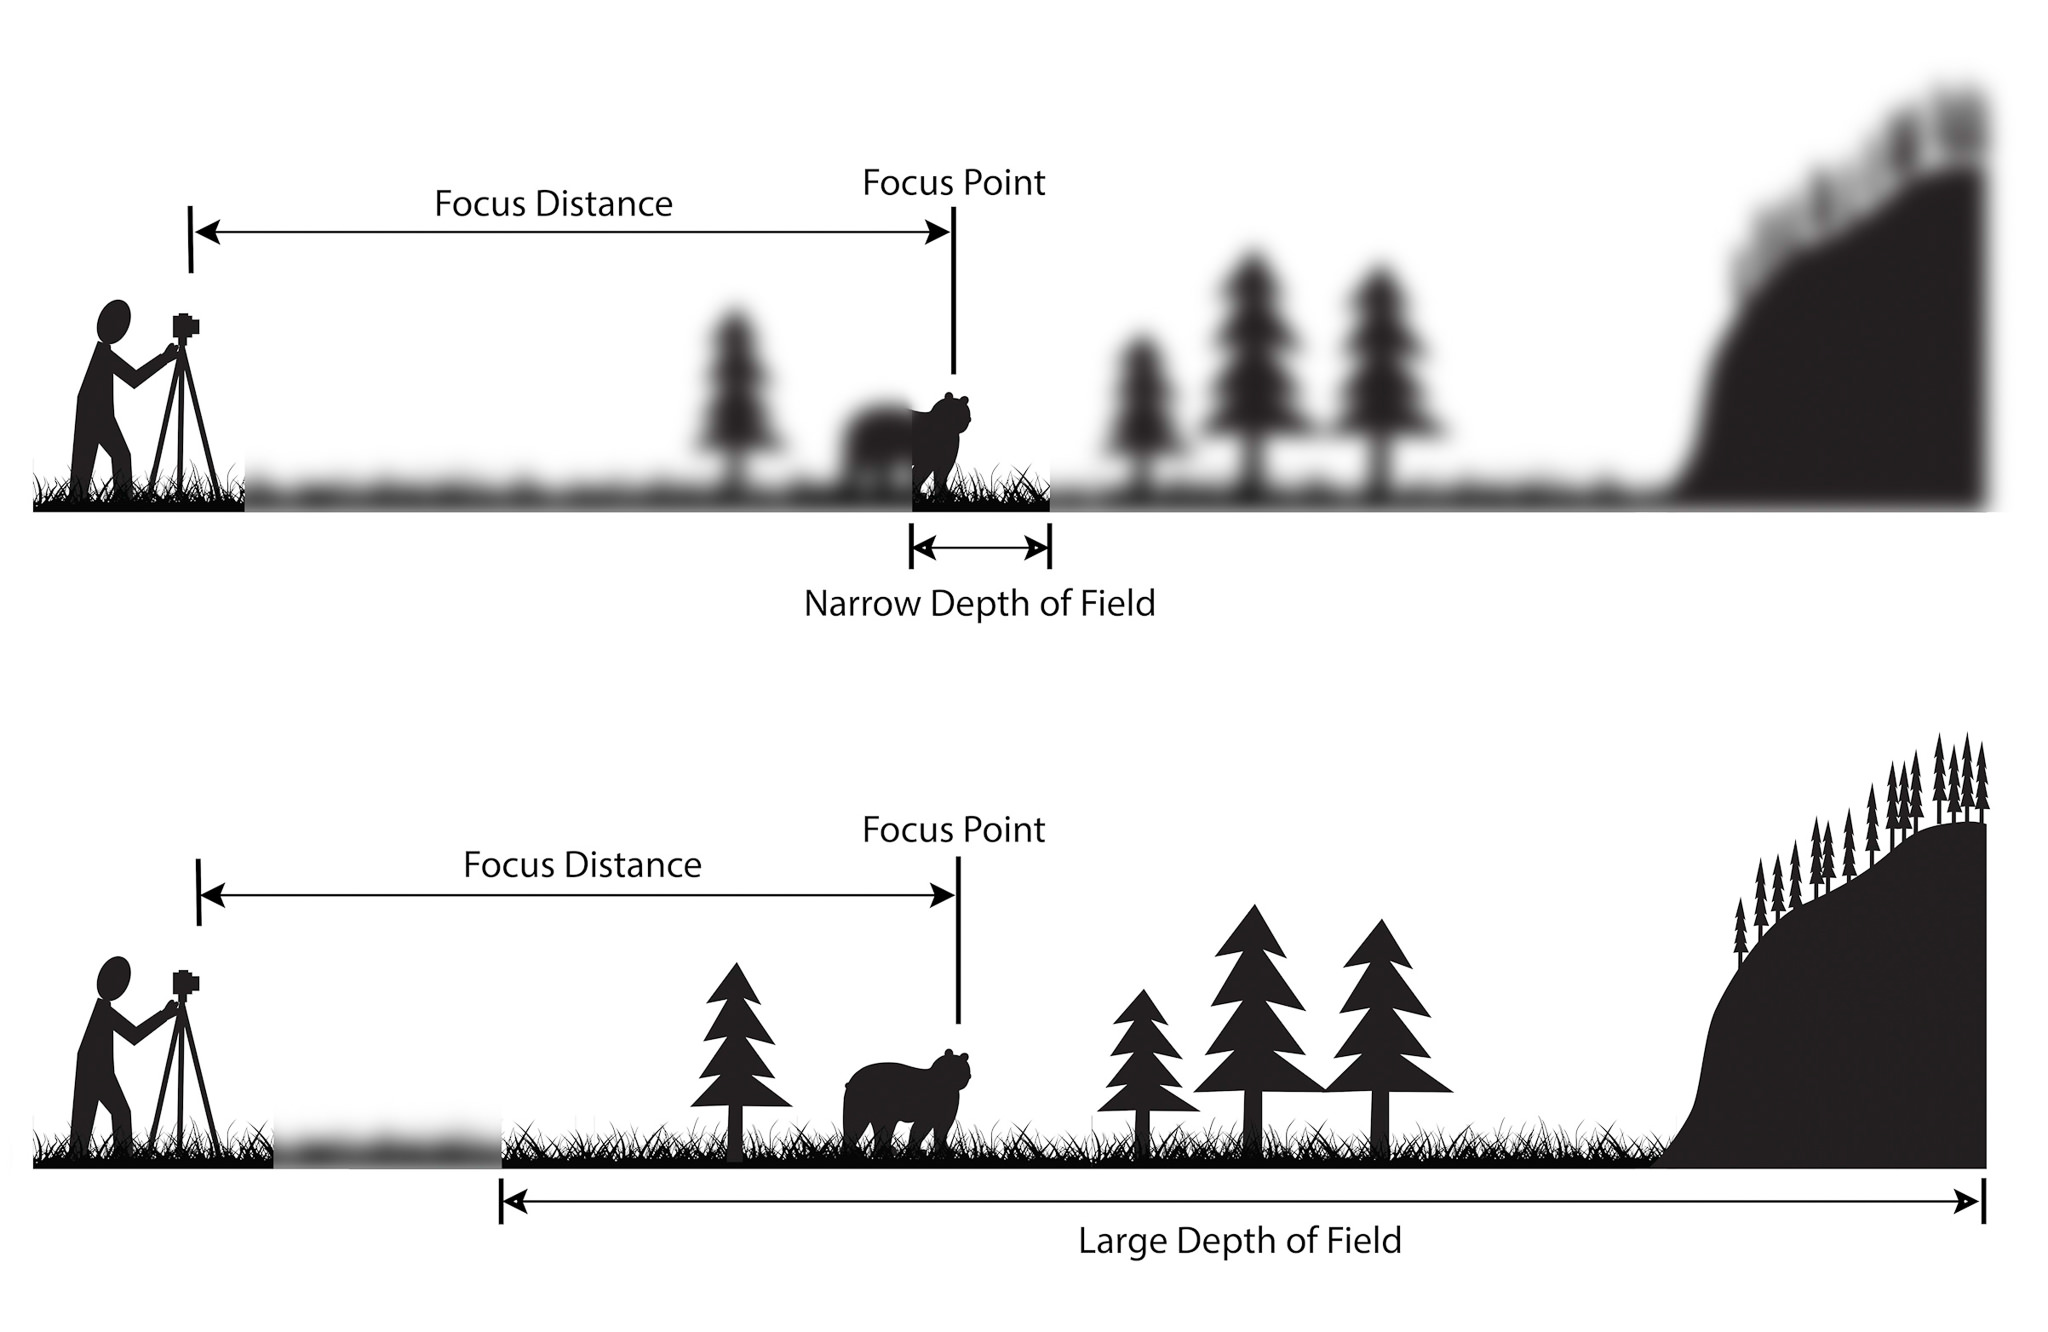
The first image shows a narrow depth of field where only the head and shoulders of the animal would be in focus with both the foreground and the background blurred. This would be achieved using a very wide aperture, as low a f-stop as possible (f2.8, f4). The second image has a very wide depth of field bringing animal , foreground and background into focus. This would be achieved by using a very small aperture, and so a high f-stop (f22 or more). These two settings create very different images of the same scene with the first very much a clear picture of the animal, whilst the second would be more of a landscape shot.
It is also worth noting that the closer the camera is to the subject the narrower the depth of field can be. The lens used is also important. It is very difficult, if not impossible, to get a narrow depth of field with a wide angle lens, which would be more appropriate for a large depth of field landscape shot, whereas the longer the lens, or focal length, combined with the greater proximity to the subject, the narrower the depth of field that can be achieved.

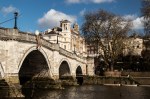
Both of the shots above were taken with a lens of 105mm and aperture set at f/4.0, generating a narrow depth of field whereby only the ‘st’ of ‘Australasia’ are in sharp focus and only the name and front part of the boat are in focus, whilst the back half of the boat and the background begin to blur. Although pretty much the same settings were used for both shots the depth of field on the first is much narrower than the second due to much closer proximity of the camera to the subject in the first.
In the two shots above I tried to get a much wider depth of field using a wide angle lens and a narrower aperture f/22 and f/11 respectively. This achieved pictures that are sharp in the foreground and background.
Three depth of field shots
Unit 1 – Task 2 – Shutter speed AC (2.1,2.2)
Shutter speed, or exposure time, refers to the amount of time that the sensor on your camera is exposed to the light of your image. Shutter speed is normally measured in fractions of a second, however very long shutter speeds can stretch into seconds and minutes. Different shutter speeds can create very different images. The faster the shutter speed the more one can freeze fast action, whilst a slower shutter speed can blur movement, both creating very different effects. Below is a brief visual description of the effect of different shutter speeds.
Depending on the focal length being used a tripod becomes necessary at speeds around 1/60, otherwise non-deliberate blur will occur.
One can adjust shutter speed directly with shutter spreed priority on the camera, or via aperture priority and ISO adjustments. This is best described in the diagram below.

Source; SLR Lounge
Working with aperture priority, the wider the aperture , the more light allowed into exposure, the faster the shutter speed. Conversely, the narrower the aperture, the less light allowed in, the slower the shutter speed. This can be offset by increasing the ISO. However, as the ISO increases , the more the quality and clarity of the final shot becomes impaired. Hence it is best to try to get the shot at ISO 100, and then acknowledge that you are comprising quality thereafter. Sometime this is necessary to get a a very fast shutter speed.
The photos above are ordered by shutter speed:-
1.This required a very fast shutter speed in order to capture a bird in flight, and in focus. In spite of having the aperture set at its widest, I still needed to increase the ISO to 500 to get the shutter speed up to 1/1250 sec.
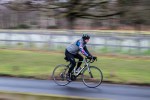
2. was a handheld ‘panning’ shot using a shutter speed of 1/50sec. By ‘panning’, or tracking the subject, the cyclist remained in focus, whilst the blurred background emphasises the sense of motion.
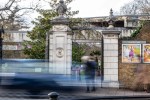
3. Here I aimed at blurring the motion of the cars and people in front of the entrance at Kew. This used a 1/5 sec shutter speed and so required a tripod set on the pavement on the other side of the road, therefore requiring extra caution with both pedestrians and traffic (LO4).
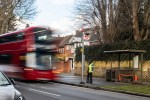
4. Similar to the third in trying to capture the motion of the bus more emphatically and the more limited motion of the waiting passenger. This required a tripod again and and in spite of f/22 aperture further help was needed from a variable neutral density filter that darkened the shot a little further, and so lengthened the exposure to 1/2 sec, thus motion blurring the bus.
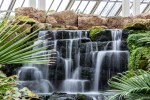
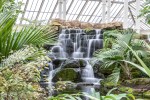
5. The longest of 1.6 sec, again needing the tripod and a f/22 aperture, and so creating the blurred/milky nature of the waterfall at Kew.
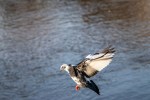
6. This shot required a fast shutter speed as I wanted to capture the gulls frozen in flight. In order to get this I had to have a wide aperture of f4, which thankfully did not effect the depth of field adversely as it was taken at a distance and with 70mm.
ICM (Intentional camera movement)


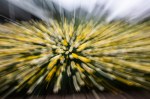


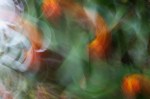
As indicated by the description these photos are taken with deliberate camera shake. A slow shutter speed is clearly required and minor movements of the handheld camera or zooming in of the lens achieves these sometimes interesting results.
Ernst Haas is a well known and rather more skilled proponent of this as can be seen below.
Source: en.wikipedia.org
Source: shutterbug.com
Three Shutter speed shots

Unit 1 – Task 3 – Postcode project (AC1.1, AC2.1, AC2.2, AC3.1, AC3.2)
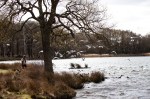
Richmond and Kew give extraordinary variety for photography. There is considerable parkland where I want to explore both landscape and wildlife photography, together with towns where I want to experiment with urban photography. I have decided to split the postcode into four areas to start this project, Richmond Park , Richmond Town, The River, Kew.
Richmond Park
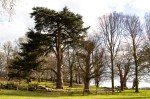
These are pretty standard shots hopefully showing the essence of Richmond Park. I have used a range of focal lengths and shutter speeds.
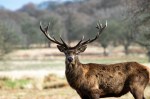
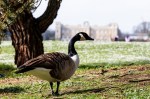
- The quintessential Richmond deer. Here I added a x1.4 converter to a 70-200mm lens, thus achieving a 280mm focal length. Due to the converter f5.6 was the widest aperture achievable to blur the background.
- Feeding the birds. Here I was shooting into the sunlight, hence the fast shutter speed. Using f4.0 was necessary to get a fast shutter speed to capture the birds in flight but still allowed long depth of field due to distance from subject and 70mm focal length.
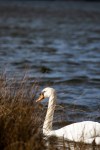
- Swan on Pen Ponds. Keeping my distance using 169mm focal length, but also using f4.0 aperture hopefully achieved a subtle blurring of foreground and background.
- Rural Richmond. You can really feel that you are far away in the countryside in the Park, in spite of being on the edge of a great city. Again using only 28mm focal length allowed broad depth of field in-spite of wide f5.6 aperture, which was needed to achieve shutter speed of 1/80 as the shot was handheld.
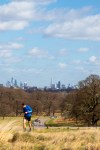
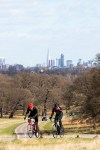
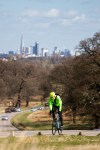
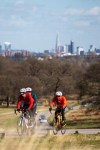
In these shots I was trying to contrast the proximity of the park to the big city with a blend of the metropolis and the wildlife/activity in the park.
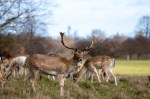
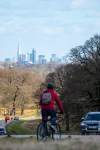
- Deer quietly grazing whilst the Natwest tower looms in the background. I used f4.0 aperture and 200m focal length to hopefully maximise contrast and blur background.
- Here I used f14 aperture to get broad depth of field and so both foreground and background in focus. This slowed the shutter speed down to 1/30 , slightly blurring the runner, hopefully getting sense of motion. The 105mm failed to get the level of relationship with the background that I wanted.
- In this shot I kept the f14 aperture for broader depth of field but used 176mm focal length making the background appear larger in relation to the cyclists.
- Here I used f4.0 aperture and 189mm focal length so that the cyclist is the point of focus whilst the foreground and background are a little blurred, and the Shard looms larger.
- Same settings as 4.0 but emphasised with more cyclists.
- In this shot settings are similar to above but point of focus was further into the distance hence bringing the Shard more into focus and the cyclist slight blurred. We are also looking towards the Shard in the distance ‘with’ the cyclist.
Richmond Town
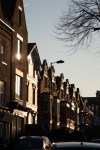
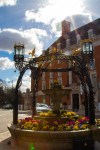
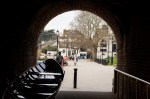
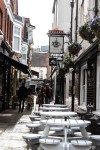
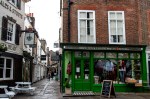
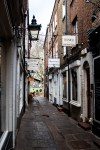
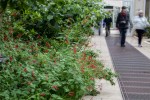
In these shots I tried to use the sunlight as well where I could. The weather was not always obliging but in shot 2 and 3 I tried to get the reflection of the sun glinting on the windows. Elsewhere I explored the the streets and alleys of Richmond. An attempt at some urban photography, which needs a lot more practice, possibly at a different time of day and with more movement.
The River

Kew
1. Here I aimed at blurring the motion of the cars and people in front of the entrance at Kew. This used a 1/5 sec shutter speed and so required a tripod set on the pavement on the other side of the road, therefore requiring extra caution with both pedestrians and traffic (LO4).
2. Similar to above in trying to capture the motion of the bus more emphatically and the more limited motion of the waiting passenger. This required a tripod again and in spite of f/22 aperture further help was needed from a variable neutral density filter that darkened the shot a little further, and so lengthened the exposure to 1/2 sec, thus motion blurring the bus. Lots of caution required using a tripod by a road, on a pavement (AC4.1).
3. The longest of 1.6 sec, again needing the tripod and a f/22 aperture, and so creating the blurred/milky nature of the waterfall at Kew.
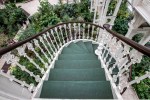
4. Spiral stairs at the ‘Temperate House’. This was a handheld wide angle shot. I had to raise ISO to 200 to get adequate shutter speed. A tripod would have been inappropriate at the top of stairs and on a narrow gangway (AC4.1). I particularly like this shot as although it is a spiral staircase, it also fells as if you are walking out into the forest, almost from a springboard.
5. Here again using a tripod I tried to combine a shot of flowers and minor movement of the people. I needed to ask permission and be wary of other pedestrians (AC4.1)
6. This again required a tripod at 1/6 shutter speed. Using 105mm focal length, f4 widest aperture and getting as close as possible I wanted to achieve narrowest depth of field with just ‘st’ of ‘Australasia’ in focus. Caution was taken not to block pathway of other visitors (AC4.1)
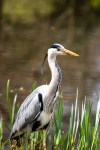
7. The Heron was standing on the edge of one of the ponds. I used maximum focal length and a wide aperture of f4 in order to try to get just the Heron in focus and a blurred background of the pond.
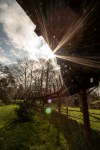
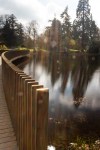
8. This is the gangway to the playground in Kew. Standing underneath with a wide angle lens I was trying to include the sweep of the walkway together with the sun shining through. By using a narrow aperture of f22 I was trying to get maximum depth of field which also helped maximise the sun-rays.
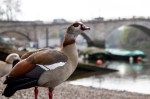
9. Here I tried to have the goose focused AND Syon House recognisable, but out of focus with modish aperture of f7.1.
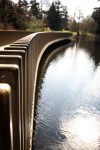
10. This modern bridge over the lake offers a lovely curving sweep across. Here I used a wide aperture of f4.5 so that as the bridge sweeps away it also fades and blurs.
11. This time I used a narrow aperture and a variable density filter to slow the exposure right down which took the glare off the lake and emphasised the sun-rays.
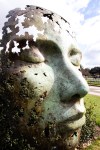
12. Simply a beautiful sculpture at Kew. Here I used a narrow aperture and wide angle lens up close to exaggerate the presence of the ‘face’ which seems to both blend into the hedge as well as project out of it.
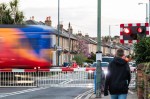
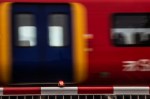
By the level crossing
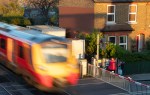
- Taken using a tripod on the walkover. This involved quite a lot of experimentation with different apertures to get different shutter speeds. 1/10 seem to get the best combination of blur and ‘substance’ of the train whilst maintaining clear focus elsewhere. Care was taken to keep clear of the pedestrians on the walkway (Ac4.1)
- This was a fortunate opportunistic handheld shot given slow shutter speed, allowing fairly clear shot of two pedestrians, whilst blurring one walking across the shot and the train. A tripod was inappropriate.
- Again a tripod was not appropriate here, but stability for the camera and slow shutter speed was found on the wall by the pavement, allowing the fairly normal street scene whilst the blurred moving train crosses.
- Here I wanted a slowish shutter speed to allow the slight blurring of the train, whilst being fast enough to be handheld.
Special safety care clearly needed to be taken here given combination of trains, cars and pedestrians. Hence a tripod was only used on the walkway. I made every effort to keep clear of pedestrians and cars (although stationary). AC4.2
Postcode 5 (plus one)
I chose the following 6 shots for the postcode project, as they display the broad variety of the area, combining tranquillity and nature with the busy nature of this suburban area so close to a big city. They all also represent different manmade pathways through that nature.
End of Unit 1
